DIY Gift Wrapping: Personalize Your Presents with a Touch of Craftiness

Introduction:
Hey there, gift-giving enthusiasts! Are you tired of the same old generic gift wrapping? Well, it's time to jazz things up and add a personal touch to your presents with some DIY gift wrapping. Not only will your gifts look extraordinary, but they will also show the recipient just how much you care. So, grab your scissors, unleash your creativity, and let's dive into the world of DIY gift wrapping!
I. Choose the Perfect Wrapping Paper:
Now, before we get into the nitty-gritty of DIY techniques, let's talk about the foundation of any great gift wrap – the wrapping paper. Choosing the right wrapping paper is essential to set the tone for your gift. Whether it's a birthday, anniversary, or a special holiday, the paper you choose can make all the difference.
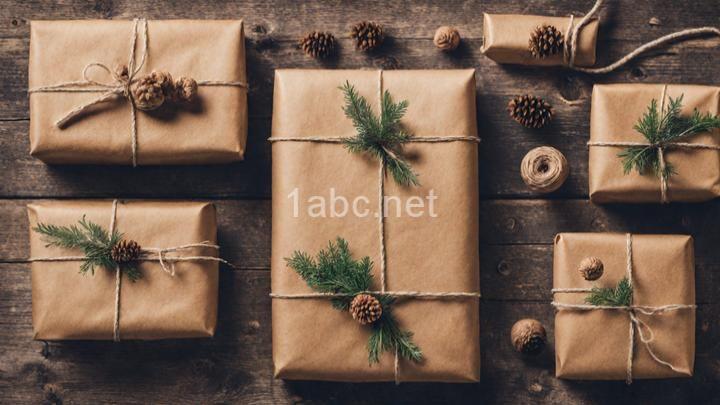
When selecting patterns and colors, consider the occasion. For a birthday, go for vibrant and playful patterns, while for a more formal event, opt for classic and elegant designs. Don't be afraid to experiment with different textures too! If you're looking for an eco-friendly option, try using kraft paper or even fabric. Not only will it look unique, but it's also a great way to reduce waste.
II. Add Unique Embellishments:
Now that you have the perfect wrapping paper, let's move on to the fun part – embellishments! Adding unique embellishments can take your gift wrapping game to a whole new level. Think ribbons, bows, tags, and more!
One way to personalize your gift wrap is by incorporating handmade elements. Get crafty and make paper flowers or stamped designs to adorn your presents. Not only will it show off your creativity, but it will also make the gift feel extra special. Don't have any craft supplies on hand? No worries! You can repurpose everyday objects like buttons, twine, or even leaves and twigs for a rustic touch.
III. Try Fun Techniques:
If you really want your gift to stand out from the rest, why not try some fun techniques? There are so many exciting ways to make your gift wrap truly unique.
For instance, have you ever tried marbling? It's a mesmerizing technique that involves swirling paint on water and then dipping your wrapping paper into the mixture. The result is a stunning marbled effect that will leave your recipients in awe. Another option is stenciling, where you can create intricate designs on your gift wrap using stencils and paint. If you're feeling especially artsy, you can even hand-paint your own designs!
If you're a visual learner like me, you might find it helpful to check out online tutorials or templates for more advanced techniques. There are plenty of resources out there that can guide you through the process step by step.
IV. Wrap Odd-Shaped Gifts:
We've all been there – trying to wrap a gift that just won't cooperate because of its odd shape. But fear not! There are solutions to this wrapping conundrum.
One option is to use gift bags. They come in various sizes and designs, making it easy to find one that suits your gift. Another idea is to use boxes with custom inserts. You can create inserts using cardboard or foam to hold the gift in place and give it a professional look. If you want to get even more creative, consider using fabric wraps. They are not only versatile but also reusable, making them eco-friendly!
Remember, the key is to make the wrapping neat and presentable, regardless of the shape. So take your time and don't be afraid to experiment with different methods until you find the perfect solution.
V. Think Outside the Box:
Gift wrapping doesn't have to be limited to traditional methods. In fact, why not think outside the box and explore unique alternatives?
One idea is to use jars or baskets to present your gift. Fill the jars with small items or treats, and decorate them with ribbons and tags. Baskets are perfect for creating themed gift sets, like a spa-themed basket with bath products and a fluffy towel. Another way to add a personal touch is by using customized labels or tags. You can print out personalized messages or even add a photo to make it extra special.
Conclusion:
And there you have it, folks! A complete guide to DIY gift wrapping. We've covered everything from choosing the perfect wrapping paper to thinking outside the box. By adding a personal touch to your presents, you're not only making them look fabulous but also showing the recipient just how much you care.
So, the next time you have a gift to wrap, don't settle for generic wrapping paper and a basic bow. Unleash your creativity, try out some fun techniques, and have a blast making your gifts extra special. After all, it's the thought and effort that count the most.
Happy gift wrapping!
FREQUENTLY ASKED QUESTIONS
What are some benefits of DIY Gift Wrapping?
There are several benefits to DIY gift wrapping that can make your presents even more special. Firstly, it allows you to add a personal touch to your gifts. By choosing your own materials, colors, and decorations, you can tailor the wrapping to the recipient's taste or the occasion. This personalization shows that you put thought and effort into the gift, making it more meaningful.
Secondly, DIY gift wrapping can be a fun and creative activity. It allows you to express your artistic side and experiment with different techniques. You can try out various wrapping styles, such as origami or fabric wrapping, which can make your gifts stand out.
Additionally, DIY gift wrapping can be a cost-effective option. Instead of buying expensive pre-made gift wrap, you can use materials you already have at home, like leftover fabric, newspapers, or brown paper. This not only saves money but also reduces waste and promotes sustainability.
Furthermore, DIY gift wrapping gives you the opportunity to reuse and repurpose materials. You can save ribbons, bows, and gift tags from previous presents and incorporate them into your new creations. This not only adds a unique touch but also helps reduce waste and contributes to a more eco-friendly approach.
Lastly, DIY gift wrapping can be a way to relax and de-stress. Engaging in a creative activity like wrapping gifts can be therapeutic and enjoyable. It allows you to take a break from the busyness of life and focus on something creative and meaningful.
Overall, DIY gift wrapping offers the benefits of personalization, creativity, cost-effectiveness, sustainability, and relaxation. It can make your gifts extra special and leave a lasting impression on the recipient. So why not give it a try and have fun while wrapping your next gift?
What materials do I need for DIY Gift Wrapping?
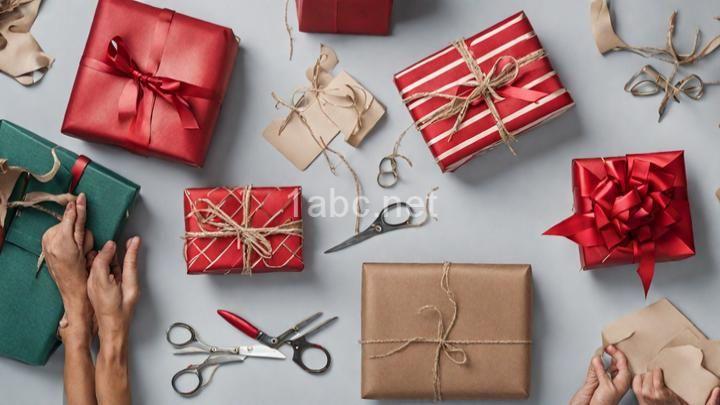
For DIY gift wrapping, you'll need a few materials to make your gifts look extra special. Here's a list of essentials to get you started:
-
Wrapping Paper: Choose a design or color that fits the occasion and reflects the recipient's taste.
-
Scissors: A good pair of scissors will come in handy for cutting the wrapping paper and trimming any excess.
-
Tape: Use clear tape or double-sided tape to secure the wrapping paper in place.
-
Ribbons and Bows: Add a touch of elegance to your gift by tying it up with a beautiful ribbon or attaching a fancy bow.
-
Gift Tags or Labels: Personalize your gift by adding a gift tag or label with the recipient's name or a heartfelt message.
-
Decorative Elements: Get creative with embellishments like stickers, washi tape, or small ornaments to add some pizzazz to your wrapped gifts.
-
Optional Extras: Depending on your preference, you can also consider using tissue paper, gift bags, or gift boxes to give your presents an extra special touch.
Remember, the materials you choose can vary depending on your personal style and the occasion. Have fun experimenting and creating unique gift-wrapping designs that will bring joy to the recipient!
Can you suggest some creative techniques for DIY Gift Wrapping?
Sure! I'd be happy to suggest some creative techniques for DIY gift wrapping. Here are a few ideas to get you started:
-
Personalized Stamps: Create your own stamp using a potato or a carving block. You can then use the stamp to add a personal touch to plain wrapping paper or even fabric.
-
Nature-Inspired: Take a walk outside and gather some natural elements like leaves, twigs, or flowers. Use these to decorate your gifts, either by tying them with twine or gluing them onto the wrapping paper.
-
Fabric Gift Bags: Instead of using traditional wrapping paper, consider making fabric gift bags. You can use scrap fabric or repurpose old clothes to create unique and reusable gift bags.
-
Paper Quilling: Add a touch of elegance to your gift wrapping by incorporating paper quilling. This technique involves rolling thin strips of paper into various shapes and then using them to adorn your presents.
-
Washi Tape Designs: Washi tape comes in a wide variety of colors and patterns. Use it to create unique designs on your wrapping paper or to add borders and accents to your gifts.
-
Upcycled Materials: Give new life to old materials by using them for gift wrapping. For example, you can use newspaper, magazine pages, or even old maps to wrap your presents. Add some colorful ribbon or twine to complete the look.
Remember, the key to creative gift wrapping is to have fun and let your imagination run wild. Don't be afraid to experiment and try out new techniques. Happy wrapping!
Are there any tips for beginners in DIY Gift Wrapping?
Certainly! Here are some tips for beginners in DIY gift wrapping:
-
Choose the right materials: Start by selecting wrapping paper, ribbons, and decorations that match the occasion and the recipient's taste. Consider using eco-friendly options like recycled paper or fabric.
-
Measure and cut the paper: Measure the size of your gift and cut the wrapping paper accordingly. It's better to have a bit of extra paper than to come up short.
-
Secure the edges: Use double-sided tape or a glue stick to secure the edges of the wrapping paper neatly. This will give your gift a clean and polished look.
-
Add a personal touch: Get creative and add personalized elements to your gift wrapping. You can attach a handwritten note, a small ornament, or even a dried flower to make it extra special.
-
Experiment with different folding techniques: Explore different folding techniques to give your gift a unique and professional appearance. You can try the classic envelope fold, pleated folds, or even origami-inspired designs.
-
Tie it up with a ribbon: Use ribbons or twine to tie a bow around your wrapped gift. You can also add additional embellishments like faux flowers, small ornaments, or charms to make it more eye-catching.
-
Don't forget the gift tag: Attach a gift tag with the recipient's name to avoid any confusion. You can make your own using cardstock, or use pre-made ones available at craft stores.
-
Practice makes perfect: Don't be discouraged if your first attempt doesn't turn out exactly as you imagined. Gift wrapping is a skill that improves with practice. Keep experimenting and trying out new techniques.
Remember, the most important thing is the thought and effort you put into the gift. Have fun and enjoy the process of creating a beautifully wrapped present!


