10 Nail Art Techniques Every Nail Enthusiast Must Try
Introduction:
Welcome to the colorful world of nail art! If you're a nail enthusiast searching for new ways to express your creativity, you've come to the right place. Nail art has become a popular trend in recent years, offering endless possibilities for self-expression and showcasing your unique style. In this blog post, we will introduce you to 10 exciting nail art techniques that will take your manicures to the next level. Get ready to dive into a world of vibrant colors, intricate designs, and endless fun!
I. Water Marble
Let's start with a technique that will leave you in awe – water marble nail art. This mesmerizing technique involves creating intricate patterns by swirling different nail polish colors on the surface of water. The result? A stunning and unique design on each nail.
To achieve a beautiful water marble design, begin by filling a small cup with room temperature water. Then, drop a few drops of your chosen nail polish colors onto the water's surface. Use a toothpick or a thin brush to create patterns by gently swirling the colors together. Once you're satisfied with the design, dip your nail into the water, allowing the polish to adhere to the nail. Carefully remove any excess polish from the water using a toothpick, and voila – you've got a gorgeous water marble design!
Pro tip: To avoid a messy cleanup, apply a layer of liquid latex or tape around your nails before dipping them into the water.
II. Gradient Nails
If you're a fan of smooth color transitions, gradient nails are the perfect technique for you. This technique involves blending multiple colors seamlessly, creating a stunning ombre effect on your nails.
To achieve a flawless gradient, start by applying a base color to your nails. Then, choose two or more colors that complement each other and apply them onto a makeup sponge or a nail art brush. Gently dab the sponge or brush onto your nails, moving from side to side to create a smooth transition between colors. Repeat this process until you're satisfied with the intensity of the gradient. Finish off with a layer of glossy topcoat for a polished look.
Pro tip: Experiment with different color combinations and finishes, such as metallic or holographic polishes, to add extra depth and dimension to your gradient nails.
III. Stamping Nail Art
Stamping nail art is a versatile technique that allows you to create intricate designs effortlessly. With the help of stamping plates and stamper tools, you can transfer intricate patterns onto your nails in a matter of minutes.
To achieve a flawless stamped design, begin by applying a base color to your nails and allowing it to dry completely. Next, choose a stamping plate with a design that catches your eye. Apply a generous amount of nail polish onto the selected design, scrape off the excess polish with a scraper, and quickly transfer the design onto the stamper. Gently press the stamper onto your nail, making sure to align the design properly. Finish off with a layer of topcoat to seal in the design.
Pro tip: Don't limit yourself to traditional patterns – experiment with different stamping designs and patterns to create unique and eye-catching nail art.
IV. Negative Space
Negative space nail art is a trend that embraces minimalism and clean lines. By strategically leaving parts of your nails bare, you can create captivating designs that make a bold statement.
To achieve clean and precise negative space designs, begin by applying a base color to your nails and allowing it to dry completely. Then, using tape, stickers, or freehand techniques, create geometric or abstract shapes on your nails, leaving parts of the nail bare. Fill in the shapes with different colors or patterns, or simply leave them empty for a minimalist look. Finish off with a topcoat to protect your design and add shine.
Pro tip: Achieving clean lines in negative space designs can be a bit challenging. To ensure crisp edges, apply a layer of liquid latex or tape around the shapes before filling them in.
V. Foil Nail Art
For those who crave a metallic touch, foil nail art is the way to go. This technique involves applying thin sheets of foil onto your nails, creating a dazzling and eye-catching design.
To achieve a flawless foil design, begin by applying a base color to your nails and allowing it to dry completely. Next, apply a layer of foil adhesive or a specialized foil glue onto the desired areas of your nails. Wait for the adhesive to become tacky, then gently press a sheet of foil onto the nail, shiny side up. Carefully peel off the foil, revealing the metallic design on your nails. Finish off with a layer of topcoat to seal in the foil and give your nails a glossy finish.
Pro tip: Play around with different foil colors, finishes, and placement to create unique and mesmerizing designs. You can also experiment with layering different foils for a multi-dimensional look.
VI. Ombre Nails
Ombre nails are all about creating a smooth color transition from one shade to another. This technique adds a touch of elegance and sophistication to your manicure.
To achieve flawless ombre nails, start by applying a base color to your nails and allowing it to dry completely. Next, choose two or more colors that blend well together and apply them onto a makeup sponge or a nail art brush. Gently dab the sponge or brush onto your nails, moving from side to side to create a seamless ombre effect. Repeat this process until you achieve the desired intensity of the gradient. Finish off with a layer of glossy topcoat for a polished look.
Pro tip: Experiment with different color combinations and finishes to create unique ombre designs that suit your style. You can also add glitter or shimmer to the ombre transition for an extra touch of sparkle.
VII. 3D Nail Art
If you want to take your nail art to the next level, 3D nail art is the way to go. This technique allows you to create textured and dimensional designs that will make your nails stand out from the crowd.
To create 3D designs, you can use acrylic powders, charms, gems, or even sculpting gel. Start by applying a base color to your nails and allowing it to dry completely. Then, using a small brush or a toothpick, apply the desired 3D element onto your nails. Get creative and experiment with different themes or occasions to showcase your unique style.
Pro tip: If you're new to 3D nail art, start with simple designs and gradually work your way up to more complex creations. Practice makes perfect!
VIII. Abstract Nail Art
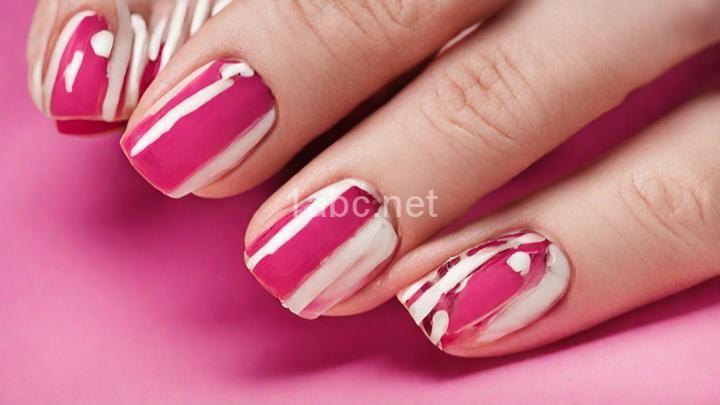
Abstract nail art is all about artistic freedom and self-expression. This technique allows you to let your creativity run wild by using brushes, dotting tools, or unconventional materials to create unique and eye-catching designs.
To create abstract nail art, start by applying a base color to your nails and allowing it to dry completely. Then, using brushes or dotting tools, create spontaneous strokes, dots, or shapes on your nails. Experiment with different colors, shapes, and textures to create a design that speaks to your artistic sensibilities.
Pro tip: Look to famous abstract artists for inspiration or create your own abstract masterpiece on your nails. Abstract nail art is all about embracing your artistic side and having fun with it!
IX. Holographic Nails
Prepare to be mesmerized by the rainbow effect of holographic nails. This technique involves using special nail polishes or powders that create a stunning, multi-dimensional display of colors on your nails.
To achieve holographic nails, start by applying a base color to your nails and allowing it to dry completely. Next, apply a layer of holographic nail polish or use a sponge applicator to gently dab holographic powder onto your nails. The result? A mesmerizing rainbow effect that will catch everyone's attention.
Pro tip: To enhance the holographic effect, try layering different holographic polishes or powders. You can also experiment with different base colors to create unique combinations.
X. Cartoon Nail Art
Last but not least, let's embrace our playful side with cartoon nail art. This technique allows you to recreate your favorite cartoon characters or motifs on your nails, adding a touch of whimsy and nostalgia to your manicure.
To create cartoon nail art, start by applying a base color to your nails and allowing it to dry completely. Then, using thin brushes or dotting tools, carefully recreate your favorite cartoon characters or motifs on your nails. Don't worry if you're not a natural artist – there are plenty of nail art decals and stickers available to make the process easier.
Pro tip: Have fun with your cartoon nail art and don't be afraid to experiment with different characters or themes. It's all about showcasing your love for cartoons and expressing your inner child!
Conclusion:
Congratulations! You've now been introduced to 10 exciting nail art techniques that will take your manicures to the next level. From water marble to cartoon nail art, there's a technique for every nail enthusiast out there. We encourage you to try these techniques and let your creativity shine. Don't forget to share your creations or ask any questions in the comments section – we're here to support you on your nail art journey. Happy painting!
FREQUENTLY ASKED QUESTIONS
What is 10 Nail Art Techniques Every Nail Enthusiast Must Try all about?
The article "10 Nail Art Techniques Every Nail Enthusiast Must Try" is a comprehensive guide that explores various nail art techniques to inspire and educate nail enthusiasts. Whether you're a beginner or an experienced nail artist, this article provides a range of techniques for you to experiment with and elevate your nail art game.From classic designs to trendy and innovative styles, this article showcases ten different nail art techniques that you can try at home or at the salon. Each technique is explained in detail, providing step-by-step instructions and tips to help you achieve professional-looking results.
Whether you're interested in creating intricate designs using nail stamping, experimenting with different colors and textures through ombré nails, or adding a touch of elegance with French tips, this article has something for everyone. It also covers techniques like water marbling, freehand nail art, and negative space nails, allowing you to unleash your creativity and express your unique style.
The article not only focuses on the techniques themselves but also provides valuable information on the tools and products needed for each technique. It discusses the importance of quality nail polishes, brushes, and other accessories to ensure the best outcome for your nail art creations.
Furthermore, the article includes beautiful visual examples of each technique, showcasing the possibilities and inspiring your imagination. Whether you prefer bold and vibrant designs or subtle and elegant looks, you'll find plenty of inspiration to take your nail art skills to the next level.
In conclusion, "10 Nail Art Techniques Every Nail Enthusiast Must Try" is a must-read for anyone passionate about nail art. It offers a wide range of techniques, detailed instructions, and inspiring visuals to help you explore new possibilities and create stunning nail designs. So grab your nail polishes, get ready to unleash your creativity, and dive into the world of exciting nail art techniques!
How can I access 10 Nail Art Techniques Every Nail Enthusiast Must Try?
To access the 10 Nail Art Techniques Every Nail Enthusiast Must Try, you can follow these steps:
-
Start by searching for the article titled "10 Nail Art Techniques Every Nail Enthusiast Must Try" on the website or blog where it is published. You can use a search engine like Google to find the specific article.
-
Once you find the article, click on the link or title to open it. This will take you to the page where the nail art techniques are listed and explained in detail.
-
Take your time to read through the article and familiarize yourself with the different techniques. Each technique will likely be accompanied by step-by-step instructions and visuals to help you understand and visualize the process.
-
As you go through the techniques, make note of any specific tools or products that are recommended for each one. This will help you gather all the necessary materials before attempting the techniques yourself.
-
If you have any questions or need further clarification on any of the techniques, look for a comments section or contact information provided in the article. You can leave a comment or reach out to the author for additional guidance or tips.
-
Once you feel confident and ready to try the techniques, gather your supplies and set aside some time to practice. Remember that nail art can be a skill that requires practice and patience, so don't be discouraged if your first attempts don't turn out perfect.
-
Enjoy the process of experimenting with different nail art techniques and let your creativity shine. Don't be afraid to put your own spin on the techniques or try variations to make them unique to your style.
By following these steps, you should be able to access and explore the 10 Nail Art Techniques Every Nail Enthusiast Must Try. Have fun and enjoy the journey of creating beautiful nail designs!
What are the different nail art techniques covered in this content?
In this content, we cover a variety of nail art techniques to help you unleash your creativity. Some of the techniques we explore include:
-
Stamping: This technique involves using pre-designed patterns on stamping plates to transfer intricate designs onto your nails.
-
Watermarbling: With this technique, you create mesmerizing patterns by swirling different nail polish colors on the water's surface and then dipping your nails into the design.
-
Gradient: Creating a gradient effect involves blending two or more colors seamlessly on your nails, giving them a beautiful ombre effect.
-
Dotting: Dotting is a simple yet versatile technique that involves using a dotting tool or a bobby pin to create various designs, such as polka dots or intricate patterns.
-
Freehand painting: This technique allows you to showcase your artistic skills by painting intricate designs directly onto your nails using a fine brush.
-
Foil application: Applying foil to your nails can add a metallic or holographic effect. This technique involves applying foil adhesive and then carefully placing the foil onto your nails.
-
3D nail art: With this technique, you can add dimension to your nails by using various materials like acrylic, rhinestones, or charms to create raised designs.
These are just a few of the nail art techniques covered in this content. Each technique offers endless possibilities for creating unique and eye-catching nail designs. So, have fun experimenting and let your creativity shine!
Are there any specific nail art supplies or tools required for these techniques?
Yes, there are specific nail art supplies and tools that are commonly used for various techniques. Here are some essentials:
-
Nail art brushes: These come in different sizes and shapes, like detail brushes, striping brushes, and dotting tools. They are used for creating intricate designs and patterns.
-
Nail art pens: These are similar to markers and allow for easy drawing and detailing on nails. They come in various colors and can be used for freehand designs.
-
Nail stamping kit: This kit includes stamping plates, a stamper, and a scraper. It is used to transfer pre-designed images onto the nails, resulting in precise and intricate patterns.
-
Nail stickers and decals: These are pre-designed stickers or decals that can be applied directly to the nails. They come in various shapes, sizes, and designs, making it easy to achieve professional-looking nail art.
-
Nail tapes and striping tapes: These are thin adhesive tapes that can be used to create straight lines, geometric patterns, or negative space designs on the nails.
-
Nail rhinestones and studs: These are small decorative elements that can be added to nail art designs to create a glamorous and textured look.
-
Nail drying spray or top coat: These products are used to seal and protect the nail art designs, ensuring longevity and a glossy finish.
Remember, while these supplies and tools are commonly used, you can always get creative and experiment with different materials to achieve unique nail art designs. Happy nail art-ing!
