Unleashing the Magic: Exploring Different Methods of Garden Perennials Propagation
Introduction:
Welcome readers to the exciting world of garden perennials propagation! In this blog post, we will delve into the various methods of propagating perennials, allowing you to expand your garden and save costs. So grab your gardening gloves and let's get started!
I. Understanding Perennials:
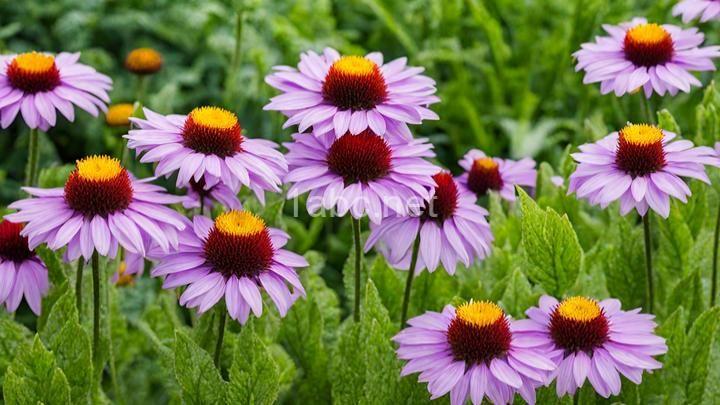
Before we dive into the propagation methods, let's first understand what perennials are and why they are essential in gardening. Perennials are plants that live for more than two years, often coming back year after year. They form the backbone of many gardens, providing vibrant colors, textures, and fragrance throughout the seasons.
The benefits of propagating perennials are numerous. By propagating your own plants, you can save money by not having to purchase new ones each year. Additionally, propagation allows you to expand your garden and share your favorite plants with friends and family. It's a rewarding process that allows you to connect more deeply with your garden.
II. Division Method:
The division method of propagation is one of the most common and effective ways to propagate perennials. It involves dividing an established plant into multiple sections, each of which can be replanted to grow into a new plant.
To successfully divide perennials, it's important to choose the right time and plants. Spring and early fall are the best times for division, as the plants are entering or leaving their active growth period. Plants that have formed clumps and have multiple shoots are ideal candidates for division.
Here's a step-by-step guide to dividing perennials:
-
Start by watering the plant thoroughly a day or two before division. This will ensure that the plant is well-hydrated and easier to work with.
-
Carefully dig around the plant, making sure to avoid damaging the roots. Use a garden fork or a sharp spade to gently lift the clump out of the ground.
-
Once the clump is out, examine it and identify natural divisions or areas where the plant can be separated. Use a sharp knife or garden shears to divide the clump into smaller sections.
-
Each divided section should have its own set of roots and shoots. Trim any damaged or dead roots, and cut back the foliage to reduce stress on the plant.
-
Replant the divided sections in prepared soil, making sure to space them adequately and at the same depth as they were before. Water them well and provide proper aftercare.
III. Stem Cutting Method:
Another effective method of propagating perennials is through stem cuttings. This method involves taking a portion of the plant's stem, encouraging it to develop roots and grow into a new plant.
Stem cuttings are suitable for a wide range of perennials, including herbs, shrubs, and flowering plants. Here's how to propagate perennials through stem cuttings:
-
Select a healthy, non-flowering stem from the parent plant. The stem should be around 4-6 inches long and have several nodes (areas where the leaves are attached).
-
Use a sharp, sterilized knife or pruners to make a clean cut just below a leaf node. Remove any leaves from the lower half of the stem, leaving a few at the top.
-
Dip the cut end of the stem into a rooting hormone powder or gel. This will encourage root development and increase the success rate of propagation.
-
Prepare a pot with well-draining soil or a propagation mix. Insert the lower half of the stem into the soil, burying at least one node.
-
Place the pot in a warm, bright location but away from direct sunlight. Mist the cutting and the soil regularly to maintain humidity.
-
After a few weeks, check for root development by gently tugging on the cutting. If you feel resistance, roots have started to form. Once the roots are well-established, transplant the cutting into its own pot or directly into the garden.
IV. Seed Sowing Method:
Seed sowing is another option for propagating certain types of perennials. It allows you to grow plants from scratch, starting with seeds collected from existing plants or purchased from a reputable source.
Before sowing seeds, it's crucial to know when and how to collect them. Seeds are usually ready for collection when the flower heads have dried out and turned brown. Gently shake the seedheads into a container to release the seeds. Store the seeds in a cool, dry place until you are ready to sow them.
To sow perennial seeds, you can choose to start them indoors or directly in the garden. Here's a general guide for both methods:
Indoor sowing:
-
Fill a seed tray or pots with a well-draining seed starting mix. Moisten the soil before sowing the seeds.
-
Sow the seeds evenly across the surface of the soil, following the packet instructions for spacing and depth.
-
Cover the seeds lightly with a thin layer of soil or vermiculite to retain moisture.
-
Place the tray or pots in a warm location, preferably with bottom heat, to aid germination. Keep the soil consistently moist but not waterlogged.
-
Once the seedlings have developed a few sets of true leaves, they can be transplanted into individual pots or trays to grow further before planting them in the garden.
Direct sowing:
-
Prepare the soil by removing any weeds and loosening it with a garden fork or tiller.
-
Sow the seeds directly into the garden bed, following the packet instructions for spacing and depth.
-
Cover the seeds lightly with soil and gently firm the soil to ensure good seed-to-soil contact.
-
Water the area thoroughly after sowing to settle the soil and provide moisture for germination.
-
Keep the soil consistently moist until the seedlings emerge and establish themselves.
V. Layering Method:
The layering method is a lesser-known but effective way to propagate perennials. It involves encouraging a stem or branch to develop roots while still attached to the parent plant. Once roots have formed, the new plant can be separated and transplanted.
There are different types of layering techniques, including air layering and simple layering. Air layering is suitable for plants with woody stems, while simple layering works well for plants with flexible stems.
To perform air layering, follow these steps:
-
Select a healthy stem on the parent plant, preferably one that is at least one year old and has a bendable section.
-
Make a small cut or remove a ring of bark on the stem, about 1-2 inches long. This will encourage root development.
-
Apply a rooting hormone to the wounded area to stimulate root growth.
-
Wrap the wounded section with moist sphagnum moss or a rooting medium, and cover it with plastic wrap. Secure the wrap at both ends to create a sealed environment.
-
Check the moss periodically to ensure it remains moist. After a few weeks or months, roots should form. Once the roots are well-developed, cut below the rooted section and transplant it into a pot or the garden.
For simple layering, follow these steps:
-
Identify a healthy, flexible stem on the parent plant that can be bent to the ground.
-
Make a small wound on the underside of the stem, near a node. This will encourage root development.
-
Bury the wounded section in a shallow trench, leaving the tip of the stem exposed above the ground.
-
Secure the bent stem in place with a U-shaped stake or a rock.
-
Keep the soil consistently moist, and after a few months, roots should form. Once the roots are well-established, cut the stem below the rooted section and transplant it.
VI. Additional Tips and Tricks:
To ensure successful perennial propagation, here are a few additional tips and tricks to keep in mind:
-
Watering: Provide adequate water to newly propagated plants, but avoid overwatering, as it can lead to root rot. Keep the soil consistently moist, but not soggy.
-
Fertilization: Apply a balanced fertilizer to promote healthy growth, but avoid overfertilizing, as it can damage the young plants. Follow the recommended dosage and frequency on the fertilizer package.
-
Patience: Propagation takes time, and not all attempts may be successful. Be patient and give the plants the time they need to establish themselves.
-
Mistakes to avoid: Avoid propagating plants that are diseased or weakened. Additionally, ensure that your tools are clean and sterilized to prevent the spread of diseases.
Conclusion:
In this blog post, we have explored the exciting world of garden perennials propagation. We have learned about the division, stem cutting, seed sowing, and layering methods, each offering its own unique advantages and challenges. By exploring these different propagation methods, you can expand your garden, save costs, and deepen your connection with nature.
Remember, propagating perennials is a journey filled with joy, experimentation, and learning. Don't be afraid to try new methods and explore different plants. Whether you're a seasoned gardener or a beginner, there's always something magical about watching a tiny cutting or seedling grow into a flourishing plant. So go ahead, unleash the magic and embark on your own propagation journey! Happy gardening!
FREQUENTLY ASKED QUESTIONS
What is garden perennials propagation?
Garden perennials propagation refers to the process of creating new plants from existing perennials in your garden. This can be done through various methods such as division, stem cuttings, or seed sowing.Division involves digging up a mature perennial and separating it into smaller sections, each with its own root system. These sections can then be replanted to grow into new individual plants.
Stem cuttings involve taking a cutting from a healthy, non-flowering stem of a perennial and placing it in a suitable growing medium. With proper care and favorable conditions, the cutting will develop roots and grow into a new plant.
Seed sowing is another method of propagating perennials. The seeds are collected from mature plants and sown in trays or pots filled with a growing medium. With the right amount of water, light, and temperature, the seeds will germinate and grow into new plants.
Propagation allows gardeners to expand their collection of perennials without having to purchase new plants. It is a cost-effective and rewarding way to increase the variety and abundance of plants in your garden. Additionally, propagating perennials can help preserve rare or endangered plant species.
It's important to note that not all perennials can be propagated using the same methods. Some may require specific conditions or techniques, so it's always a good idea to research the specific requirements of each plant before attempting propagation.
Overall, garden perennials propagation is a wonderful way to propagate and share the beauty of your favorite perennial plants while also adding diversity to your garden.
Why should I propagate my garden perennials?
Propagating your garden perennials can bring numerous benefits to your garden. Here are a few reasons why you should consider propagating your perennials:
-
Cost-effectiveness: Propagating your perennials allows you to expand your garden without spending a lot of money on new plants. By taking cuttings or dividing existing plants, you can create new plants for free.
-
Garden rejuvenation: Over time, perennials can become overcrowded and lose their vigor. Propagating them through division or cuttings helps rejuvenate the plants by giving them more space to grow and ensuring healthier growth.
-
Sharing with others: Propagating your perennials gives you the opportunity to share your favorite plants with friends, family, or fellow gardening enthusiasts. It's a wonderful way to spread the beauty of your garden and create lasting connections.
-
Experimentation and customization: Propagation allows you to experiment with different techniques and create new variations of your favorite plants. You can also customize your garden by propagating specific varieties that suit your taste and preferences.
-
Insurance against loss: Perennials can be vulnerable to diseases, pests, or extreme weather conditions. By propagating your plants, you can create backups or replacements in case any of your beloved perennials face unexpected challenges.
Remember, each perennial has its own specific propagation methods, so it's essential to research and understand the requirements of each plant before attempting propagation. Happy propagating!
What are the different methods of garden perennials propagation?
There are several methods of propagating garden perennials. Here are a few common ones:
-
Division: This involves dividing the root clump of a mature perennial into smaller sections and replanting them. This method works well for plants that have clumping growth habits, such as daylilies or hostas.
-
Stem Cuttings: This method involves taking a cutting from a healthy stem of the perennial and rooting it in a suitable growing medium. This is commonly done for plants like lavender or salvia.
-
Layering: Layering is a technique where a portion of a stem is partially buried in the soil to encourage root growth. Once roots have formed, the new plant can be separated from the parent plant. This method is often used for plants like hydrangeas or roses.
-
Seed Propagation: For perennials that produce seeds, you can collect the ripe seeds and sow them in a suitable growing medium. This method requires some patience as it may take longer for the plants to mature.
It's important to note that not all perennials can be propagated using all of these methods. Some plants may have specific requirements or limitations when it comes to propagation. It's always a good idea to research the specific needs of the plant you are trying to propagate to ensure success.
How do I divide garden perennials?
Dividing garden perennials is a great way to propagate and rejuvenate your plants. Here's a step-by-step guide on how to do it:
-
Choose the right time: The best time to divide perennials is in early spring or fall when the weather is cool and plants are dormant or just starting to grow.
-
Prepare the plants: Water the plants thoroughly a day before dividing them to ensure they are well-hydrated. This will make the process easier and reduce stress on the plants.
-
Dig up the plant: Carefully dig around the perimeter of the plant, creating a circle or trench around it. Use a garden fork or shovel to lift the plant out of the ground, being mindful not to damage the roots.
-
Divide the plant: Once the plant is out of the ground, gently shake off any excess soil to expose the roots. Depending on the plant, you can divide it by pulling apart the clumps with your hands, using a sharp knife or garden shears to cut through the roots, or teasing the plant apart with two garden forks.
-
Trim and discard: Inspect the plant and remove any dead or damaged foliage, as well as any old or non-productive parts of the plant. These can be discarded or composted.
-
Replant the divisions: Prepare the new planting holes by loosening the soil and adding compost or organic matter. Place the divided sections in the holes, making sure the crown (where the roots meet the stem) is level with the soil surface. Backfill the holes with soil and gently firm it around the plants.
-
Water and mulch: After planting, water the divisions thoroughly to settle the soil and provide moisture to the roots. Apply a layer of organic mulch around the plants to help retain moisture and suppress weeds.
-
Care and maintenance: Keep the newly divided plants well-watered for the first few weeks to help them establish. Monitor their growth and provide regular care, such as fertilizing, pruning, and protecting from pests and diseases.
Remember, not all perennials need to be divided, so it's important to research the specific requirements of each plant before attempting the division. Happy gardening!
